|
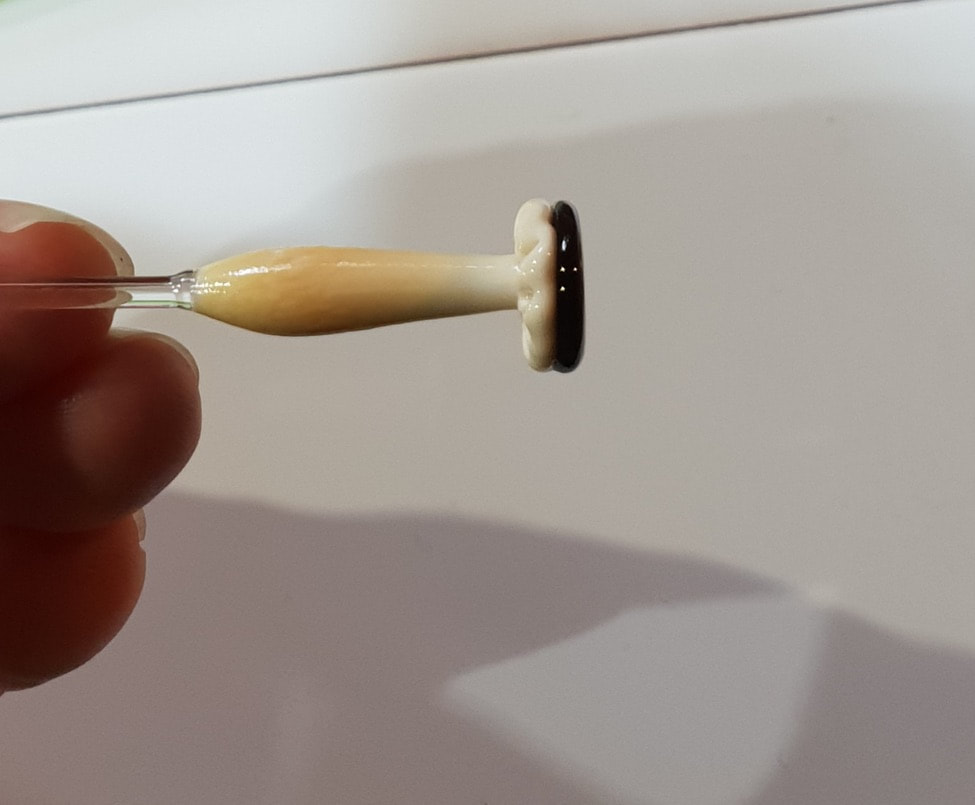
Mushrooms have always been one of our most popular items. I make them on short steel spikes so they're ready to pop into a pot plant, and fairy gardeners (is that what you call someone with a fairy garden?) love them. Que prefers to work off-mandrel and as she cleverly took all the photos while working, this week we have an off-mandrel mushroom tutorial. Hope you enjoy it. Make a gather at the end of an ivory rod and with a small clear punty pull out your stem to the desired size, making the base a little more bulbous than the tip. Once the glass has settled add another small gather for the underside of the shroom. Gently press this to flatten it a bit and then with the tip of a knife blade make creases to suggest gills. This can be a bit fiddly so take your time; heat a small section of the underside and rest the top of the mushroom down on your marver while you push some creases in, then heat the next section and continue, working your way around the cap. Gently heat the flat top and add a small gather of light red glass, let it round out and settle and then gently reheat and shape it into a cone, rolling it at an angle on your marver. Add some white dots and melt them in, being careful not to get the top too hot or you will lose your lovely shape. And voila! you have your first mushroom/toadstool. Once it's cool you can hold it by the cap and melt the punty off. We let them cool down in the perlite and batch anneal later when we have a large enough crop. It's fun playing with different colours and shapes and patterns. Try adding frit for speckled tops as in the first photo, or go wild and create whole new species. Once you've made a couple it's easy enough to join them by gently heating just their ends and then letting them flow together and adjusting their posture as they set up. We'd love to see your photos if you make yourselves some of these little fantastic fungi. |
AuthorWrite something about yourself. No need to be fancy, just an overview. Archives
January 2022
Categories |
Glass Mad


 RSS Feed
