|
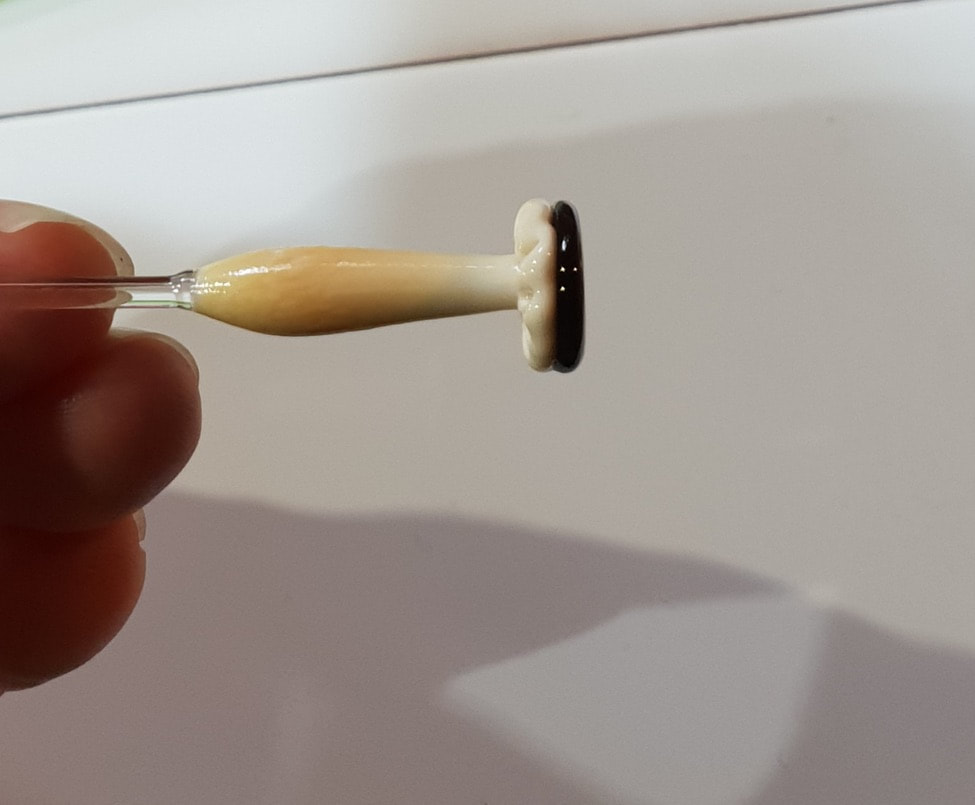
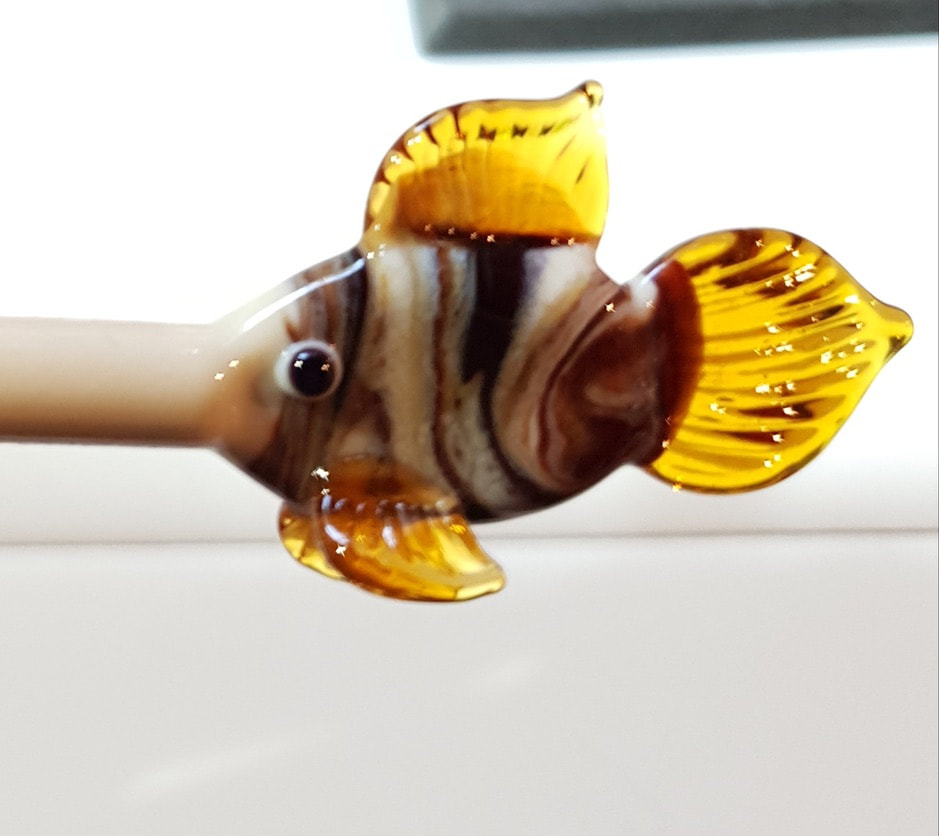
When Que sent me the photos for the mushroom tutorial (see last blog entry) there was one image which made me laugh out loud and suggested what our next tutorial could be - creating a caterpillar! Besides being super cute, these are an excellent way to learn to recognise your heat base in soft glass and how to time your joins so that everything flows together happily while also retaining clear definition. First, choose your favourite caterpillar colour. Transparent colours are generally stiffer and easier to work with if you're just learning to sculpt, and if you have any of the translucent CIM colours these are a good choice, they're sort of soft and sticky at the same time, lovely for sculpting. You'll also need a colour for an eyeball, and black for the pupil, and a punty made from your caterpillar colour - just pull it down into a blunt point. Gently heat the end of your rod and let the glass condense and form a pea-sized ball. The next step is easier if you can narrow the neck - where the ball and rod join. With a nice sharp little flame heat the rod in that spot and then hold your glass vertically with the ball at the bottom, it should stretch a little to form a neck. Let the ball cool again and then reheat just the tip of it to an orange glow, heat the end of your punty briefly and kiss them together to join. You can see in the photo it isn't fully melted in but is sitting securely on the blunt tip of the rod. Once joined let them cool again - these are very small pieces of glass and if you work too fast without giving things a chance to set up everything will moosh together and not keep the lovely ball shapes. With a nice sharp flame heat the line where you creased the ball and once it's glowing pull the two pieces apart and then let the ball round up into a sphere. If it's too small you can add a bit more glass before rounding, if it's too big you can wipe off a bit of the excess back onto the rod while it's still hot. (If you have trouble with this step make sure you heat the line and pull just enough so the flame cuts through the join, instead of pulling too far and elongating everything.) All of this gets easier with practice, and we recommend melting things back and starting again until you feel happy with your shapes. One of the many advantages of working so small, it's pretty quick and easy to practice, practice, practice! Before long you will develop a rhythm for this; make a pea-sized ball on the end of your rod, heat and hang to narrow the join and let it cool. Reheat just the tips of the last ball and the new one and once they're glowing kiss them gently together out of the flame. It can help to do a little push-pull movement here to ensure a good join. Remove the rod at the narrow point by flamecutting. Round up the ball into a nice sphere and while it's still warm you can add two little feet, giving them enough heat so they flow and form a smooth connection. Avoid undercut joins as they're almost certain to crack off eventually. In this way continue to join as many balls, with feet, as you like, making sure to line the feet up with previous feet so your caterpillar will be able to stand. To finish the body, begin to join the balls so they start to angle upwards by changing the spot where you heat. It's fun to really play around with this and make longer curvier caterpillars, once you get the hang of it. When your new friend is as long and tall as you like it's time to add some eyes. While the ball is still warm from rounding it up add two dots of colour (or white with a transparent colour on top) and gently flatten with a knife or paddle. Well, I flatten them with a paddle but Que likes to leave them round, preferring the more googly cartoony-looking eyes. Two smaller black dots for pupils and suddenly your caterpillar will come to life, don't be surprised if you get the giggles at this point, there's something really funny about your creation looking back at you! For the final touch heat above the eyes and add another two dots for feelers. Do these the same way you added feet but this time once they're on pull them out longer and into a curly shape, or keep them shorter and flatten the ends for a different sort of look. Or of course, practice making teeny tiny spheres in various colours and stack them up! Que also adds a crease with a knife to give them a mouth but Penel doesn't bother with this step because her eyesight is not as good! Because you've been working your way gradually along the caterpillar it won't have a whole lot of heat left in it at this point and so it's safe to pop it into your vermiculite or fibre blanket to finish cooling off. You can make a whole herd of little creatures this way and then batch anneal in the kiln later. When your caterpillar is cool you can hold the head and safely melt off your punty, forming a smaller sphere or a curly tail tip as in the photo above. Remember the photo I mentioned that made me laugh out loud? Here it is below; once Que starts playing with an idea she tends to get carried away. I just love this little critter with the fancy toadstool cap holding another one on a leaf, and check out how nicely curved the segments are, with two points of contact for the feet to stand on. If you've enjoyed this tutorial and made some caterpillars please share them with us on facebook or instagram - we'd love to see them!  Mushrooms have always been one of our most popular items. I make them on short steel spikes so they're ready to pop into a pot plant, and fairy gardeners (is that what you call someone with a fairy garden?) love them. Que prefers to work off-mandrel and as she cleverly took all the photos while working, this week we have an off-mandrel mushroom tutorial. Hope you enjoy it. Make a gather at the end of an ivory rod and with a small clear punty pull out your stem to the desired size, making the base a little more bulbous than the tip. Once the glass has settled add another small gather for the underside of the shroom. Gently press this to flatten it a bit and then with the tip of a knife blade make creases to suggest gills. This can be a bit fiddly so take your time; heat a small section of the underside and rest the top of the mushroom down on your marver while you push some creases in, then heat the next section and continue, working your way around the cap. Gently heat the flat top and add a small gather of light red glass, let it round out and settle and then gently reheat and shape it into a cone, rolling it at an angle on your marver. Add some white dots and melt them in, being careful not to get the top too hot or you will lose your lovely shape. And voila! you have your first mushroom/toadstool. Once it's cool you can hold it by the cap and melt the punty off. We let them cool down in the perlite and batch anneal later when we have a large enough crop. It's fun playing with different colours and shapes and patterns. Try adding frit for speckled tops as in the first photo, or go wild and create whole new species. Once you've made a couple it's easy enough to join them by gently heating just their ends and then letting them flow together and adjusting their posture as they set up. We'd love to see your photos if you make yourselves some of these little fantastic fungi. Following on from last month's post we thought we'd show another cool thing to do with your shorts, once you've joined them together so you don't burn your fingers of course. Fish! These are a great way to begin off-mandrel sculpting skills; small and simple, cute and colourful, and very popular with customers and their kids.  First choose your colours; you're going to be mixing them so you don't need very much of any single colour, and this is a great time to experiment and see what happens when you mix periwinkle with ink blue, or black with white - both make great and very different purples. Choose a coordinating transparent colour for the fins and tail, and a black and a white stringer for the eyes. Heat both rods and once they're happily glowing smoosh them together by joining their tips and then sliding each along the other for about an inch. Watch the heat and when the whole joined section is molten and smoothing out begin stirring them into each other being careful not to trap any air. You want the glass to be flowing easily into itself as you mix. The more you mix the more homogenised the resulting colour will be and this stage is quite mesmerising as the colours mix and do their own thing. We like to stop at a point where they've marbled together forming fascinating and unique patterns and reactions. Don't you just love that dark ivory? Gently flatten the blob of colour and heat out the chill marks as you marvel at how gorgeous it looks. Pull the glass into a slightly more elongated fishy shape, we use a small clear stringer for most of these sorts of manipulations. Using your chosen transparent colour/s add a mass for the tail, the dorsal fin and two ventral fins. Transparents look lovely because they glow in the light but are also easier here because they tend to be stiffer and will hold their shapes better while you work. With your flat nose pliers or a fin masher, texture the tail and pull it into a pleasing shape. Likewise, press the dorsal fin and then the ventral fins. Give these a slight pull away from the body of the fish to make it easier for the finished fishy to stand, balancing on these and the base of the tail. Now it's time for the finishing touches. A dot of white or another colour that contrasts with the body, followed by a smaller black dot and suddenly you've brought the fish to life. If like me you have trouble getting the eyes lined up use your peters tweezers or bail biters to gently press even indentations as markers for where to place those dots. Nearly there! Shape the dorsal fin and leave the rod attached by just a small point - stretch it out and away from the fish so it's easy to remove without cracking your fin later. And then make your mouth, here Que has added a dot of contrasting colour and taken the shot before the final press of the mouth - it's not easy making and shooting each stage of the fish by yourself, let alone remembering which steps to take photos of. As you can see her fish didn't object to being repeatedly held out of the flame to have the progress shots taken. These are so small and simple you really don't have to worry about them getting unhappy or cracking during the making, providing you remember this: The most important rule in sculpting with soft glass is NEVER GO BACK! Once you've pressed and shaped each little element to your satisfaction, leave it alone and be careful not to let the flame hit it again. Always try to work from the larger mass outward to the smaller ones, and all will be well. Here are some other fish showing off their indented mouths which give them such character. You can also use a knife blade to crease across the mouth which gives puffy kissing lips (my favourite method).
Have fun making your own school, and if you do and you share them please tag us so we can see your creations. This is a familiar question on lampwork forums, and not only from beginners; what DO you do with all those shorts? That colourful pile of ends that builds up as you work and quickly covers your bench once you've fallen in love with melting glass? Some people bag them up and sell them, some shove them into jars or trays or boxes and forget about them. There are special rod holders you can buy which let you use them up almost to the end without burning your fingers, or like us you can simply join them to other rods of glass as you go, and keep on working. Adopting this last option not only saves you money and ensures you're not wasting any precious colour but also gives you good practice in heat control, teaches you about the different viscosity of each colour, and how to make a good hot seal, and how to keep things on axis as you work. All great skills we can never have enough of.  If you manage to keep your shorts under control, joining rods as you go every time, give yourself a gold star. Despite our best intentions they still somehow manage to build up, even though we start nearly every session at the torch joining a few, there always seem to be more at the end of the day than there were at the beginning. And then there are the little odds and ends of stringers, twisties and wigwags. These are usually smaller in diameter, 2 - 3mm, colours that have been mixed or twisted or built up and then pulled down and used for decorations. In order not to run out midway through a creation most of us try to make more than we think we'll need and invariably end up with a pile that looks something like this:  Sometime last year Que helped clean and organise a friend's studio and came home with a large collection of these random little bits saving them from getting binned. After wondering what on earth to do with them all she decided to practice her marble making skills. And because she is a miniaturist at heart, and because some of these pieces were seriously short, it wasn't long before the marbles became smaller and smaller and almost impossible to find in the tray of perlite.  If you're working small it's fine to let the pieces cool down slowly in this stuff and batch anneal in the kiln later when you have enough to fill it. With these little babies, making enough to fill the kiln could take some time, so it's a good option.  Here's a hot shot showing just how small she's working, these are seriously short shorts!  And another, showing how even the wonkiest twistie can turn into a pretty good looking marble.  Did I mention how small these were? That's 27 marbles not even filling the palm of her hand. Turns out it won't take long to fill that kiln after all; on that first day Que made over 100 of these teeny tiny little beauties. Did I mention how obsessed she gets when she's on a roll?  Who knew a pile of wonky ends could work up into such a juicy bowl of gorgeous colour? This is satisfying on so many levels - using up what was destined for the bin, practicing so many skills, having a ton of fun, and ending up with such a yummy result!
What do you do with YOUR shorts? A long time ago in a land far away… well, okay, not that long ago and it was only the NSW North Coast… a small girl child was born into a family of creative people, her grandmother a potter, her grandfather a painter and her mother the sort of person who liked to do a little bit of everything. For many years they played happily together on all sorts of projects; drawing, painting, rug hooking, crochet, dyeing, sewing, embroidery, knitting, paper mache, papermaking, bookmaking, calligraphy, writing, felting, even macrame. (anyone care to guess which of these little cuties is which?)  |
AuthorWrite something about yourself. No need to be fancy, just an overview. Archives
January 2022
Categories |
Glass Mad


 RSS Feed
